Upload a Preprint
This Article Is Licensed Under CCO For Maximum Reuse.
Preprints offer a way to share your research quickly, receive feedback from the community, and gain a wider audience for your work. OSF Preprints and the community preprint services follow the same upload process. Read our Preprint FAQs to learn more about preprints.
All preprints receive a DOI and persistent URL to allow your preprint to be cited, and the option to add supplemental files, like data or analysis scripts.
- Overview of preprints interface
- Title and abstract
- Files
- Metadata
- Author assertions
- Supplements
- Review
Select a preprint service
Select a preprint service (header tab)
The OSF is home to dozens of moderated preprint services that allow you to share your preprint (Pre-publication) with a community of researchers.
To select a preprint service start by clicking the “Add a Preprint” tab found at the top of the page:

This will take you to an all-encompassing list of our preprint providers.

For a description, hover your cursor over the preprint serve. Once you have chosen click the “select” box.

Then click the blue “Create preprint” button at the bottom.

Select a preprint service (Service homepage)
On each preprint service homepage you can select the green “Submit a preprint” Button and start the submission process to that specific preprint service.

You can explore these preprint services by going to https://osf.io/preprints and scrolling down to our list of preprint services.

1. Overview of preprint interface
Welcome to our new preprints interface. In order to navigate through you will need to complete the required fields at each step. You can select to delete your preprint draft at any time using the delete button, until submission. After the preprint as been submitted, a preprint can only be removed if it is “withdrawn” This will leave the metadata associated with the submission as a record of the submission.
2. Title and abstract

Start by adding a title (#1) and an abstract (#2) informing the readers about your preprint. Please note that the abstract must be at least 20 characters long. To proceed click the blue “Next” Box (#3) Once you have completed both the title and abstract.
3. Files
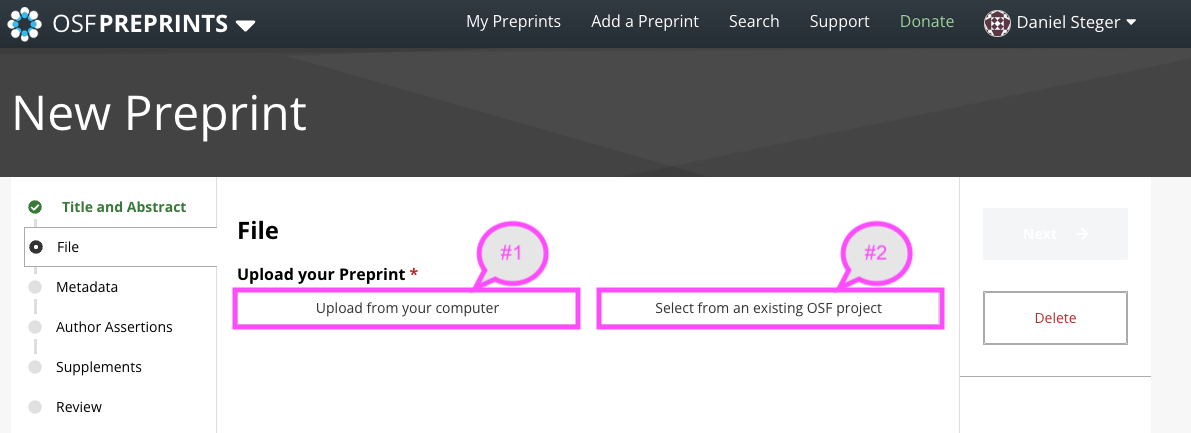
Next, upload a file to your new preprint. This can be done through uploading a file from your computer (#1) or selecting from an existing OSF Project (#2)
(#1) Upload from a computer:
Click the “upload from your Computer button” You will then have the option to drag and drop a file directly from your computer or you can click to browse for files.
Drag and drop:

Browse from files from the Desktop:

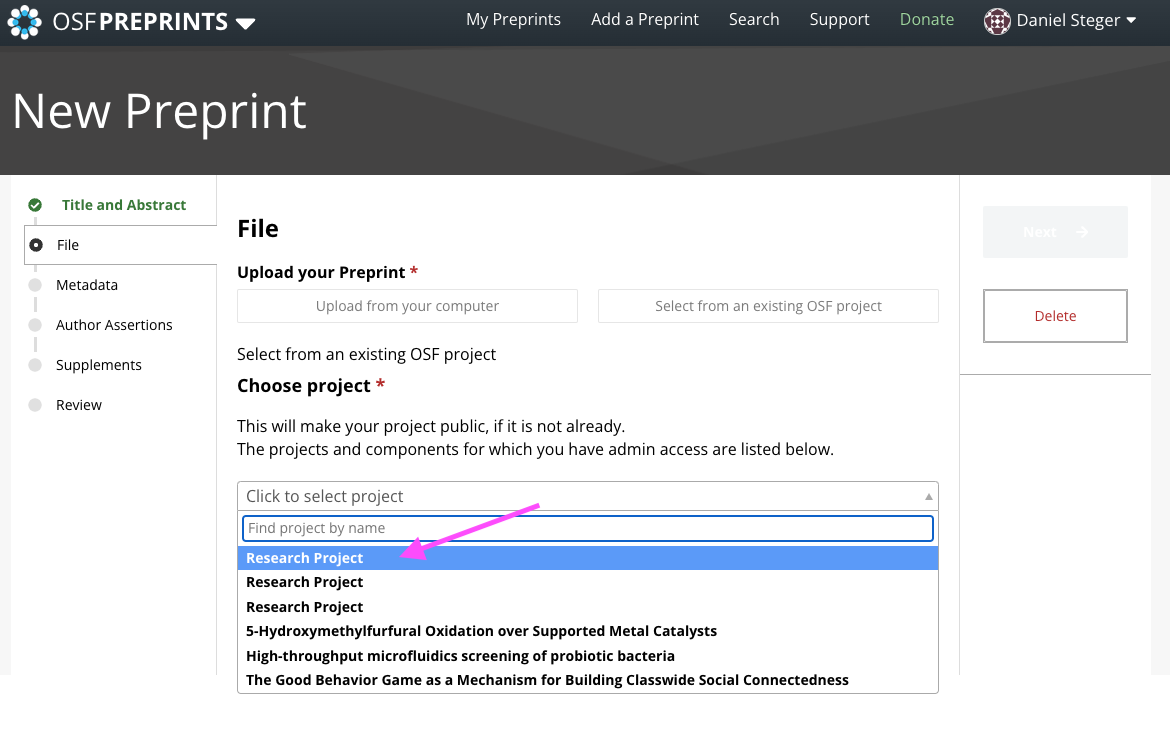
(#2) Select from an existing project
Start by clicking the “select from an existing project” button and click the dropdown menu to select your project
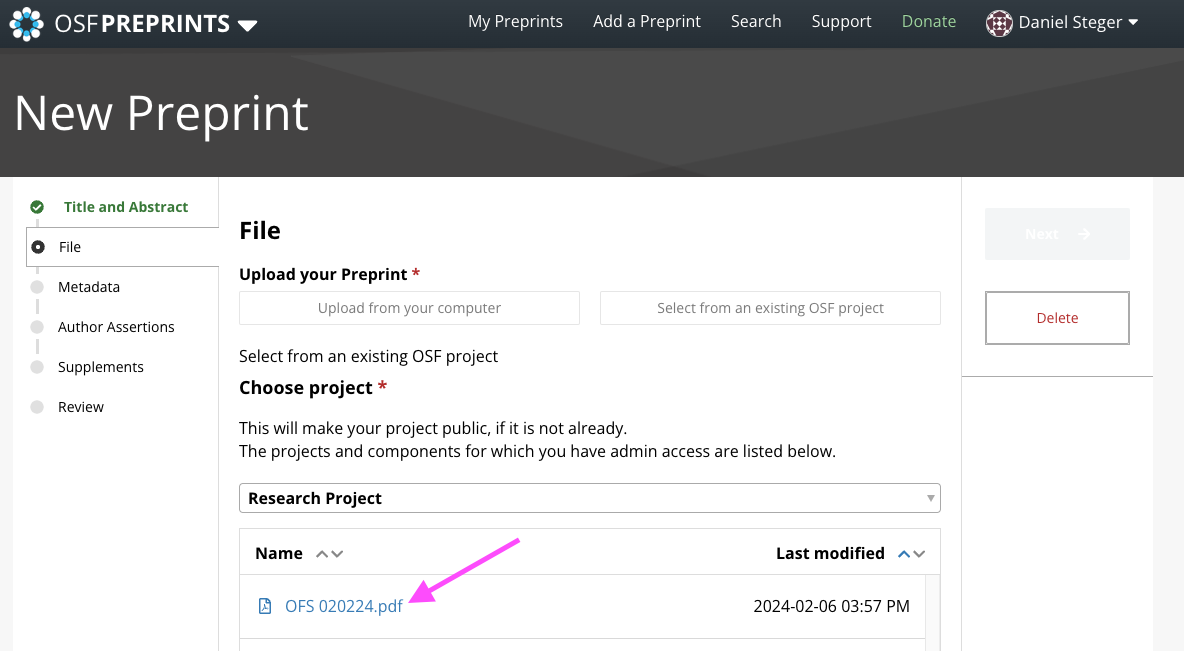
Select the file you want to use as your preprint manuscript.
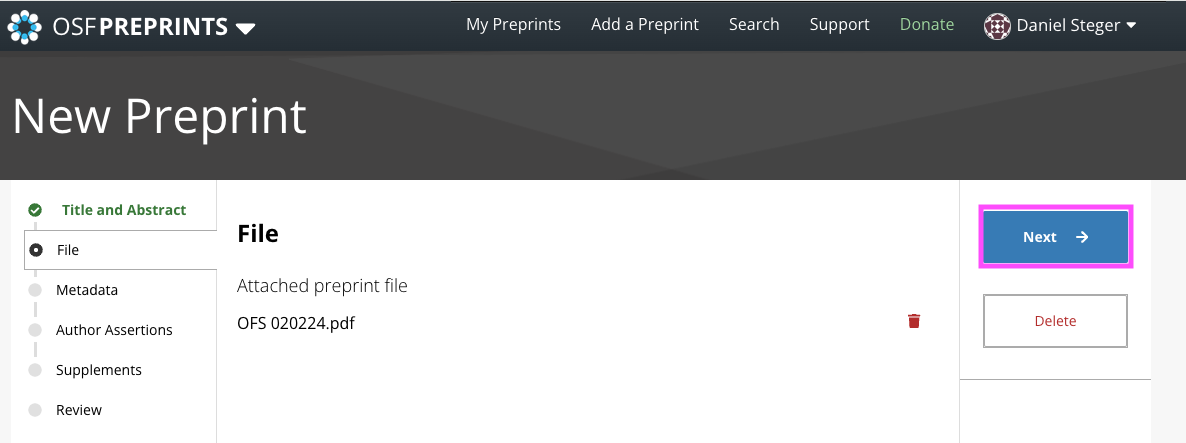
Finalize the upload by clicking the Blue “Next” button
4. Metadata
Metadata is identifying data about your work and is used to help other researchers find, cite and identify appropriate studies.
Contributors:
Permissions:
All co-authors are given read+write permissions by default. The different levels of permissions are:
- Read: The author can view the preprint but does not have permission to edit.
- Read + Write: The author can view the preprint but does not have permission to edit. The author can add supplemental files.
- Administrator: The author can view and edit the preprint, add supplemental files, and manage authors and permissions.
If a co-author does not have an account on the preprint service, they can be added as an unregistered user. If a co-author already has an account, they can be added as a registered user.

A registered auther is someone who already has an OSF account. Use this option if your co-author has an account on the OSF or preprint service.
Enter your co-author's name or OSF Profile Information (ORCiD ID, Twitter handle, GitHub username, etc.) into the search box, then click the magnifying glass button.
Find their name in the search results, then click the Add button next to their name.
Your co-author will be added.
An unregistered author is someone who does not have an OSF account or an account on the preprint service. Use this option if your co-author doesn't have an account on the preprint service.
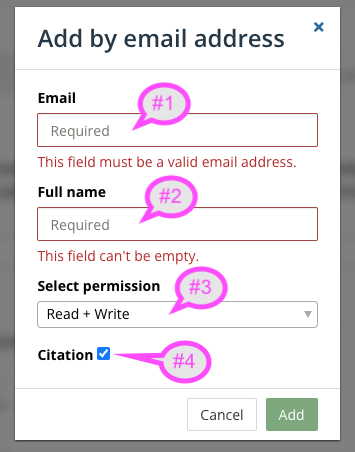
Click the “add by email address”

Enter the #1 Email address, #2 full name, and #3 select the permission level of your new co-auther, #4 choose whether they should appear in citations by checking or unchecking the box. Close by clicking the “Add” button.
Citation:
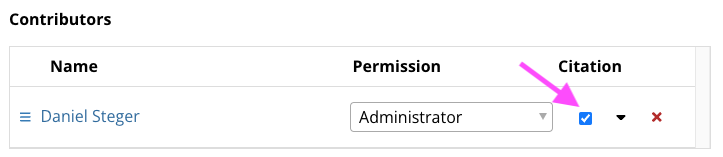
Next, select their permissions and choose whether they should appear in citations by checking or unchecking the box in the "Citation" column.
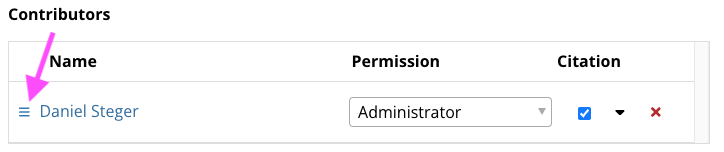
The order in which your authors appear in the "Authors" list is the order in which they will appear in citations. To reorder authors, click the icon with three bars, then drag and drop the authors into the correct order.
Affiliated OSF Institution:
OSF institution is a pay-for-service tool for universities, and research institutes to house, aggregate, and develop a community among their researchers. As a researcher, if you are a part of one of these institutions you can connect your preprint with your institution branding by clicking the box.

All of the institutions that are connected to your account (normally through an email domain) will display. If you need more information about connecting your institution to your account please see the institution section
License:
A license tells others how they can use your work in the future and only applies to the information and files submitted with the registration. For more information, see this help guide.
Select a license by clicking the dropdown menu and selecting an option

Subject:
Subjects allow users to categorize their work for easier search and identification by other researchers. Be sure to use the #1 “search subject” tab or the #2 Down Arrow to find more options.
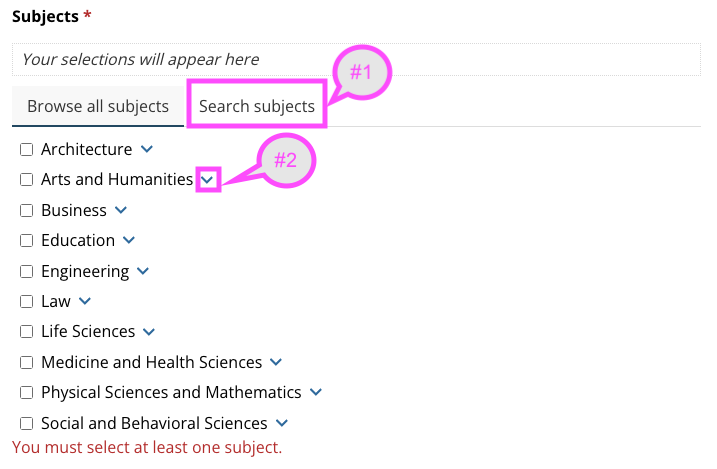
To select a subject click the box next to the subject.

Tags:
Tags are an excellent way of highlighting keywords to help your work appear in a researcher's search criteria. Start with the generic terms associated with your project (ex. Virology) and work towards more specific terminology (Covid-19)
Publication DOI, Publication Date, Publication Citation :
Have you already published this preprint in a peer-reviewed journal? You can provide the DOI number, the Publication date, and the Publication Citation. This information can be added/ edited after the submission of the preprint.
5. Author assertions
Author assertions about the availability of associated public data, associated preregistrations, and disclosure of any Conflicts of Interest (COS) increase transparency for readers and make it easier for readers to find the associated data underlying your preprint. Please note that not all preprint providers require author assertions as part of their submission process.
Conflict of interest:
Conflict of interest (COI) disclosures increase transparency for readers. The COI assertion is made on behalf of all the authors listed for this preprint. Examples of potential conflicts of interest include: financial involvement in any entity such as honoraria, grants, speaking fees, employment, consultancies, stock ownership, expert testimony, and patents or licenses. COIs can also include non-financial interests such as personal or professional relationships or pre-existing beliefs in the subject matter or materials discussed in this preprint.
Do you have a Conflict of interest disclosure to assert for this preprint? Select Yes to disclose any conflicts of interest (COI).
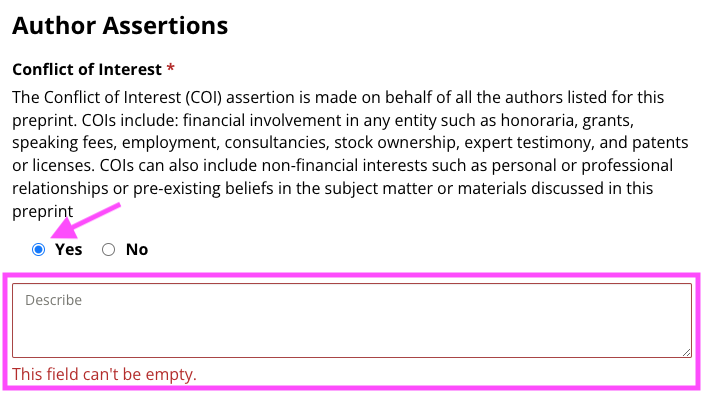
If No is selected, the authors assert that there are no COIs.

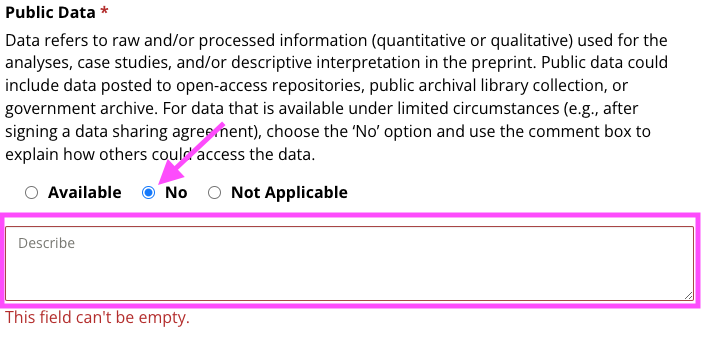
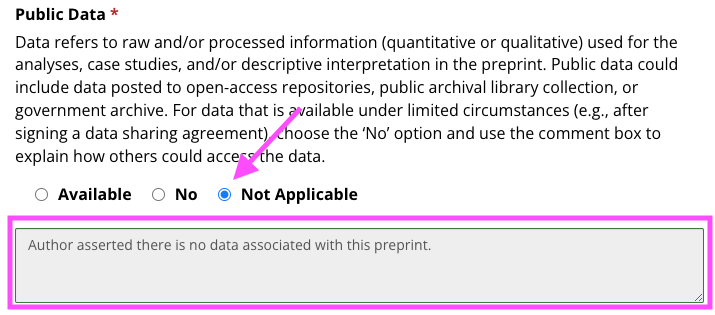
Public data:
If any of the data used in the analyses in your preprint are publicly available, select Available to indicate this. A box will appear for you to enter link(s) to your publicly available dataset(s). If your preprint involves multiple datasets posted at different URLs, click the ‘plus’ icon to add more boxes. Only put one url per box.

If No is selected, the author asserts that data associated with analyses in the preprint are not publicly available. A required text box will appear. Use this box to give more information about why data is not publicly posted, or how others might access the data if it is available under limited circumstances (e.g. after signing a data-sharing agreement)
If Not Applicable is selected, the author asserts that no analyses are reported in the preprint, and so there is no data that could potentially be made publicly available.
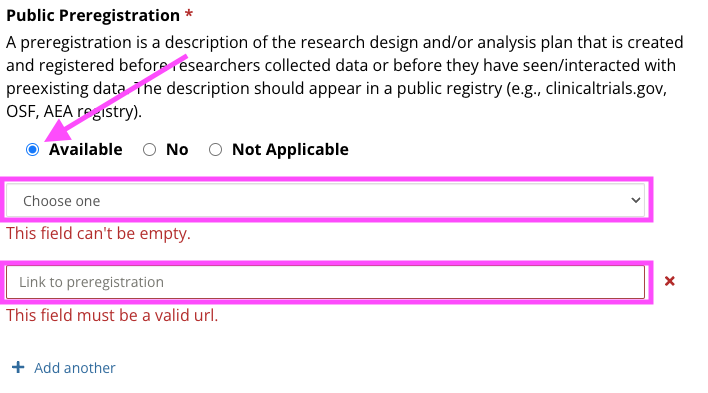
Public Preregistration:
If you registered or Pre-registered your study prior to your preprint and they are publicly available, select Available to indicate this. Two boxes will appear, one to help you indicate the type of registration you created, and the second to provide a link to that registration/ pre-registration. A box will appear for you to enter link(s) to your publicly available dataset(s). If your preprint involves multiple registrations, Click the “+ Add another” link to another. Only put one URL per box.
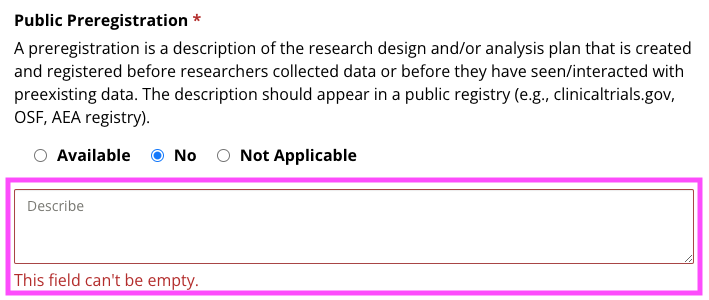
If No is selected, the author asserts that a preregistration associated with the preprint is not publicly available. An optional text box will appear. Use this box to give more information about why the preregistration is not publicly available.
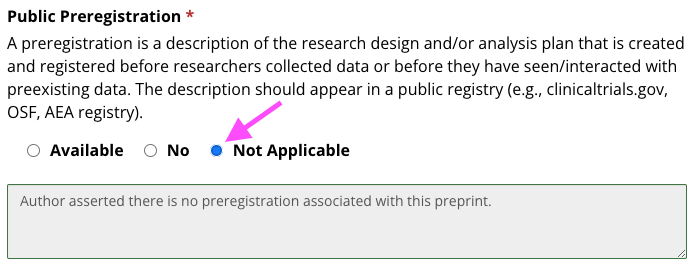
If Not Applicable is selected, the author asserts that a preregistration is not applicable because no data collection, extraction, or analysis is reported in the preprint.
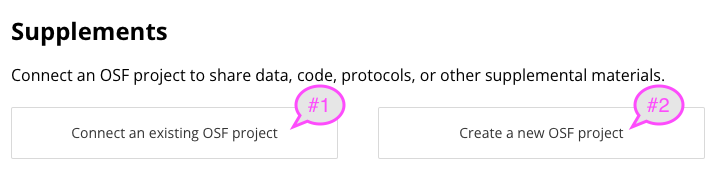
6. Supplements
This is an optional stage to connect any associated data, codes, protocols, or other supplementary materials found on an OSF project that help inform the preprint.
You can either #1 connect an existing OSF project or #2 create a new OSF project.
Connect an existing project:
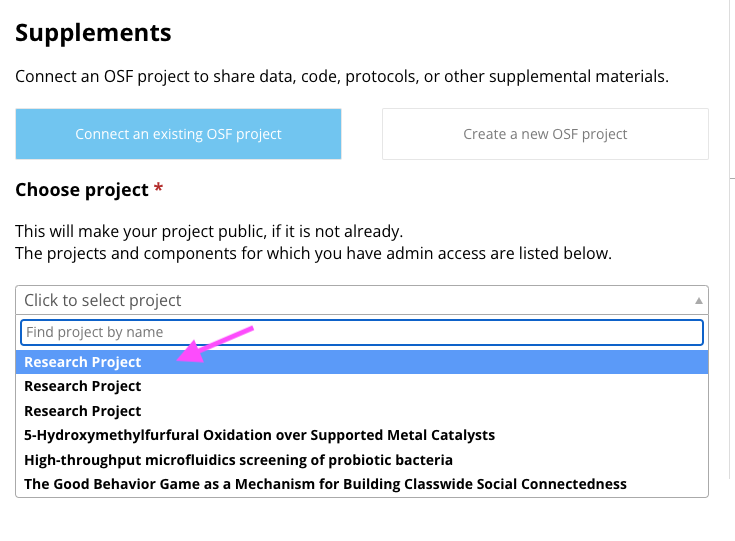
After clicking “connect and existing OSF project”, choose one of your existing projects from the drop-down menu, to connect the project click on the project title when highlighted.
Create a new project:
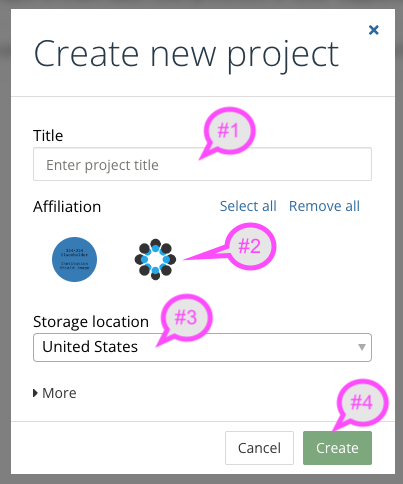
If you are looking to create a new OSF project to connect to your new preprint submission start by clicking the “create a new OSF project” button. A pop up window will appear. Fill out your #1 project title, #2 OSF intuition affiliation, #3 Storage location for your project, and then click the #4 green “Create” button.
7. Review
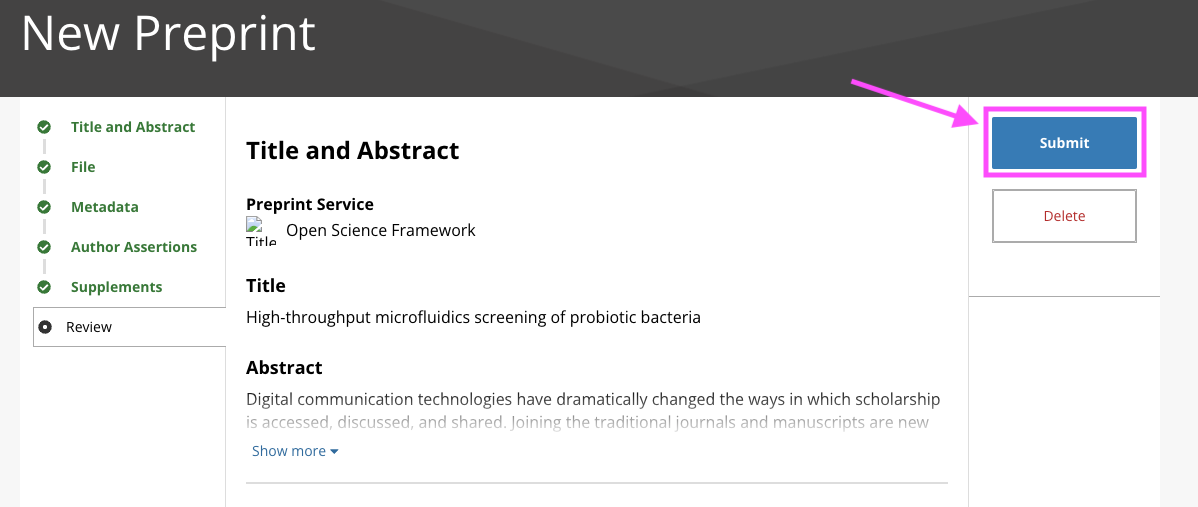
Once you have reviewed and confirmed your information click the blue “submit” button
After submission, your preprint will enter moderation. More information on the moderation process can be found in our preprint moderation guide